Feedback or Testimonial Module is the module for Opencart by which customers can provide their feedback about the site or product or any services. We were encouraged to develop it because there is a review system for the products but not for the site and services so we made this feedback or testimonial module.
INSTALLATION OF FILES:
- Unzip the zip file where you will find “Testimonial-OpenCart-Module-Free-master” folder.
- “Testimonial-OpenCart-Module-Free-master” folder contains “admin” and “catalog” folder
- Upload the files and folders of the admin and catalog folder to your OpenCart root folder. You can use FTP or SFTP to upload these files and folders.
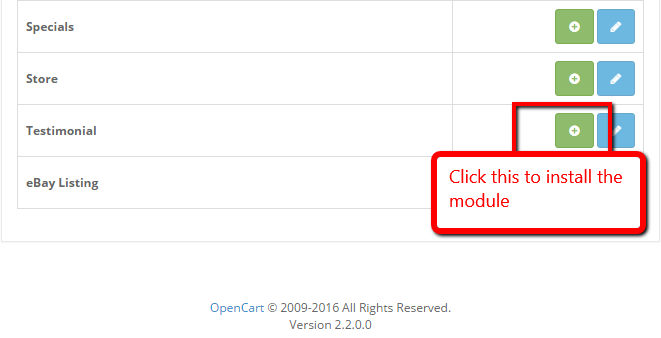
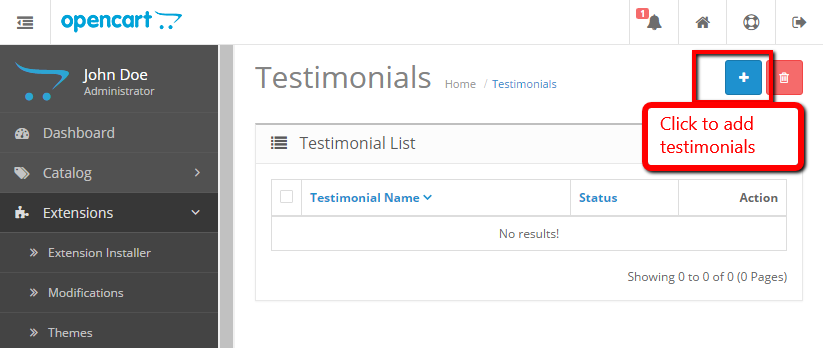
- After completing uploading, login to the admin section, go to Extensions > Modules.
- Go to “Testimonial” and click the green install button.
- Our Testimonial module is installed. Now click blue edit button. If this is first time then you will see like the following image to install the database.
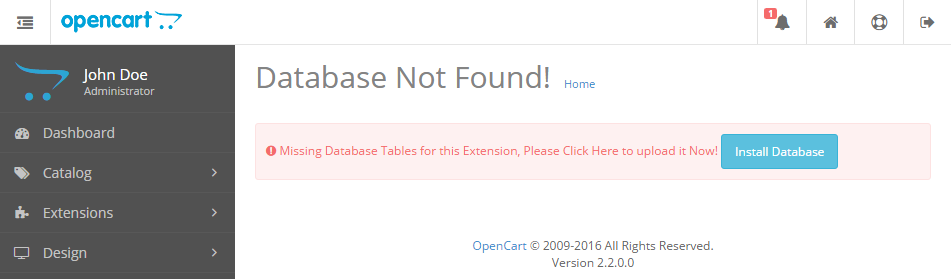
- Click the Install Database button and three tables are created in database. As following sql queries are run, for easy installation I created this way.
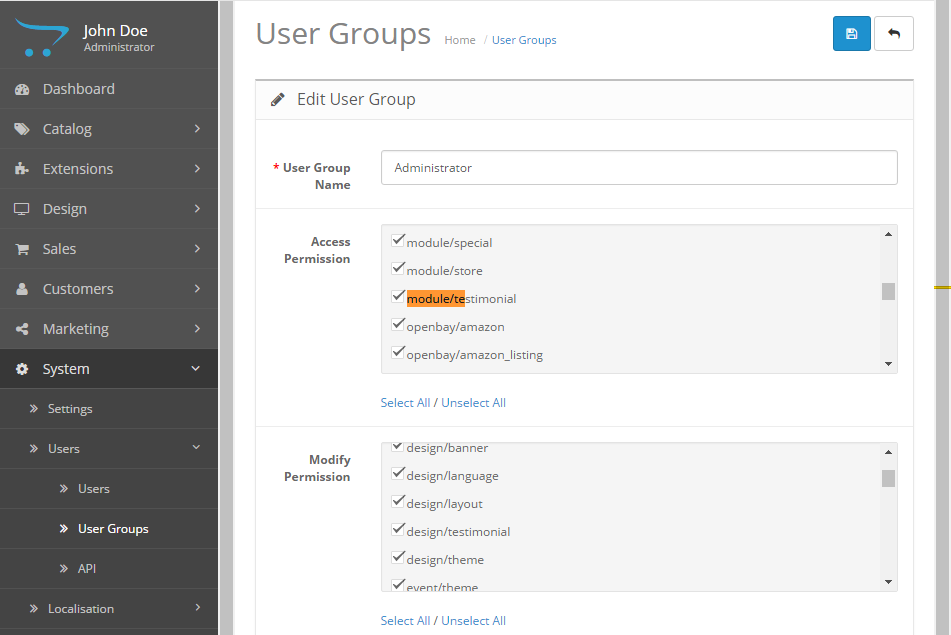
CREATE TABLE oc_testimonial ( testimonial_id int(11) NOT NULL, name varchar(64) NOT NULL, status tinyint(1) NOT NULL ) ENGINE=MyISAM DEFAULT CHARSET=utf8; CREATE TABLE oc_testimonial_image ( testimonial_image_id int(11) NOT NULL, testimonial_id int(11) NOT NULL, link varchar(255) NOT NULL, image varchar(255) NOT NULL, sort_order int(3) NOT NULL DEFAULT '0' ) ENGINE=MyISAM DEFAULT CHARSET=utf8; CREATE TABLE oc_testimonial_image_description ( testimonial_image_id int(11) NOT NULL, language_id int(11) NOT NULL, testimonial_id int(11) NOT NULL, title varchar(64) NOT NULL, message text NOT NULL, name varchar(250) NOT NULL, position varchar(250) NOT NULL ) ENGINE=MyISAM DEFAULT CHARSET=utf8; ALTER TABLE oc_testimonial ADD PRIMARY KEY (testimonial_id); ALTER TABLE oc_testimonial_image ADD PRIMARY KEY (testimonial_image_id); ALTER TABLE oc_testimonial_image_description ADD PRIMARY KEY (testimonial_image_id,language_id); ALTER TABLE oc_testimonial MODIFY testimonial_id int(11) NOT NULL AUTO_INCREMENT, AUTO_INCREMENT=11; ALTER TABLE oc_testimonial_image MODIFY testimonial_image_id int(11) NOT NULL AUTO_INCREMENT, AUTO_INCREMENT=144; - Wait did you see Permission Denied message. Then it means you do not have permission to access this page, please refer to your system administrator. If you are administrator then Go to the System >> Users >> User Groups and edit the “Administrator” or related user group and then check checkbox “module/testimonial” and “design/testimonial” in both Access Permission and Modify Permission as in the figure. For easiness you can click “Select All” in both permission and grant all access ( Do this only for top administrator).
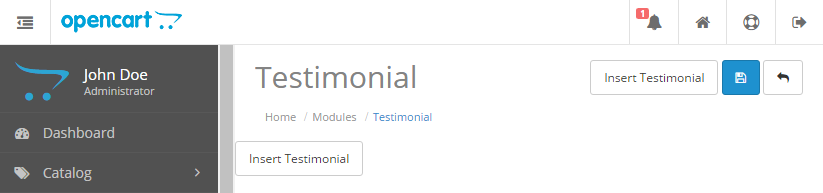
- Once you grant permission, you will be able install the database and install the module. Now edit the “Testimonial” module and click the “Install Database” blue button.
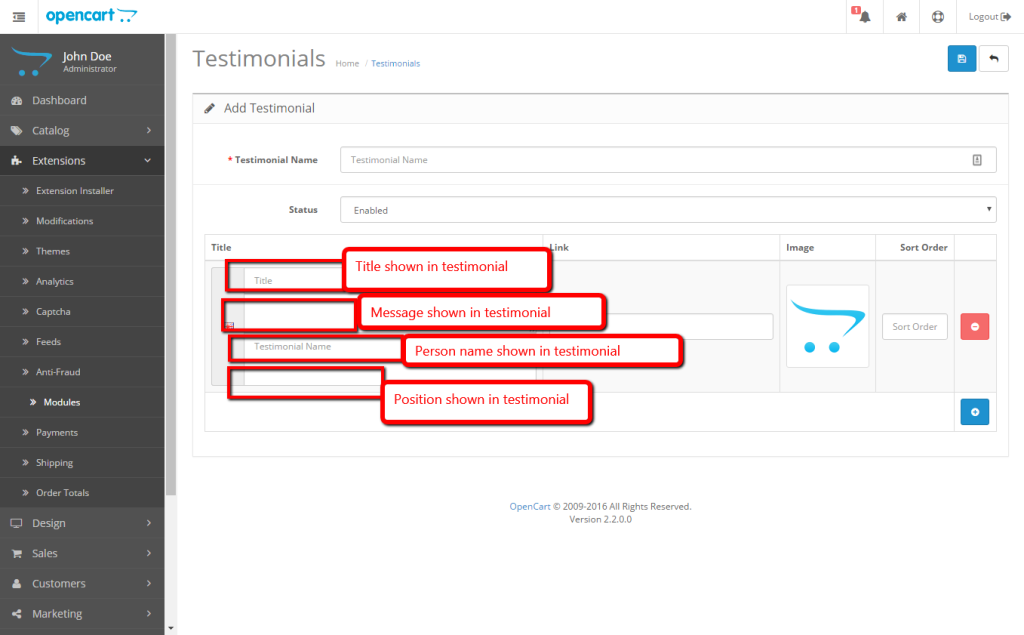
- Now you will see as following image where you will insert the Testimonial, click the Insert Testimonial button.
- You can insert multiple list of testimonial so you can show different testimonials in different layouts.
- Now start to inserting testimonials by clicking the blue button and see the image what goes where:
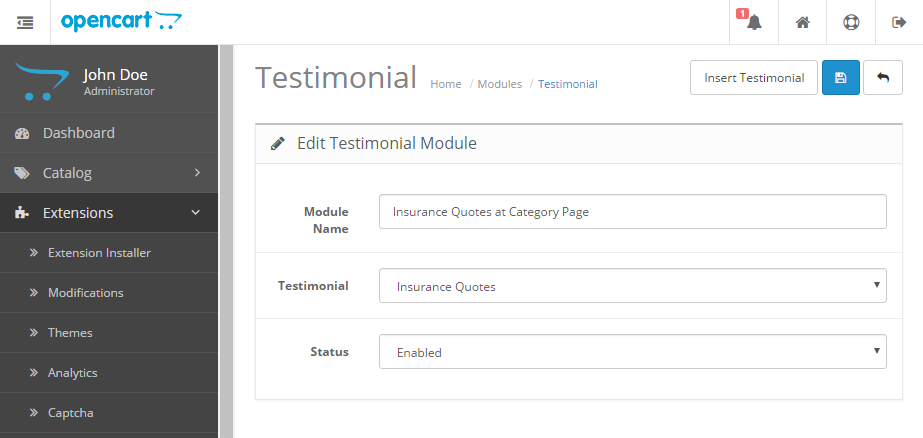
- After inserting these you choose that into the testimonial module. Go to Admin>> Extensions>> Modules >> Testimonial >> Edit
- Now activate Testimonial module
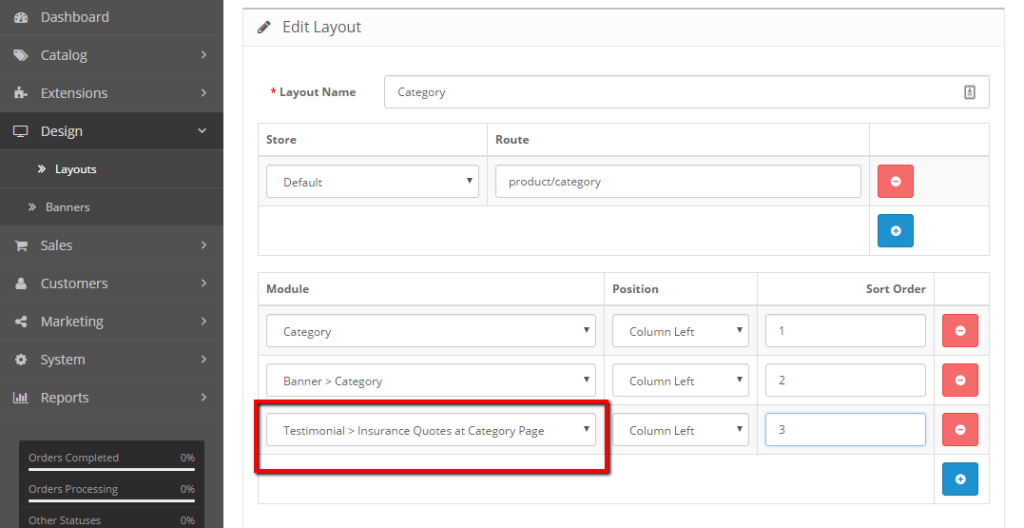
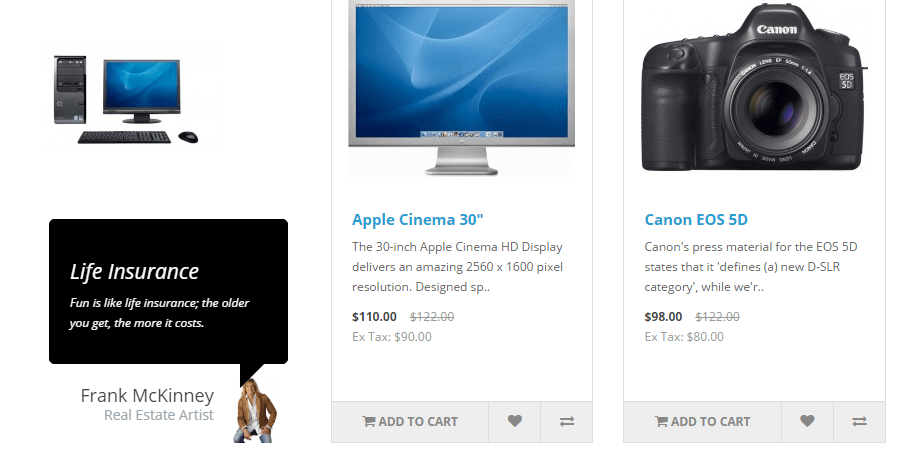
- Now go to Admin >> Design >> Layout, then edit the “Category” from the list. We are showing our testimonial module at category left column.
- Now view any category page and you will see like the image below:

- You are ready to go live.
- If you feel like you have to change the CSS then you can edit catalog/view/theme/default/module/testimonial.tpl. We integrate the CSS in the same file so that it does not conflict with others.
- If you want to change animation then you can set at catalog/view/theme/default/module/testimonial.tpl


<script type="text/javascript">
    $('#testimonial<?php echo $module; ?>').owlCarousel({
        items: 6,
        autoPlay: 5000,
        singleItem: true,
        navigation: false,
        pagination: false,
        rtl:true,
        transitionStyle: 'fade'
    });
</script>
Other than that if you need help then please comment below.
Thanks
Rupak Nepali
COPYRIGHT:
This module code is the intellectual property of the designers involved in its creation. As an Opensource code you are entitled to use it freely and modify it if you wish but please keep the credits intact.